Bread, Sweet

Accidental cinnamon roll loaf

My daughter always asks me why I don’t make pizza on Friday like her grandad does and unfortunately my answer is because I don’t have time when I’m back from work.

I love making bread and bread based things, there’s something so satisfying about doing it all by hand and the smell when they’re baking is just wonderful.

But with a full time job and 2 children I don’t get much chance to do it, so I decided – let’s make bread!

I was initially going to make bagles but I’ve decided to leave these till a weekend or Friday morning so we can have fresh ones when my daughter is home… Now we have cinnamon rolls instead.

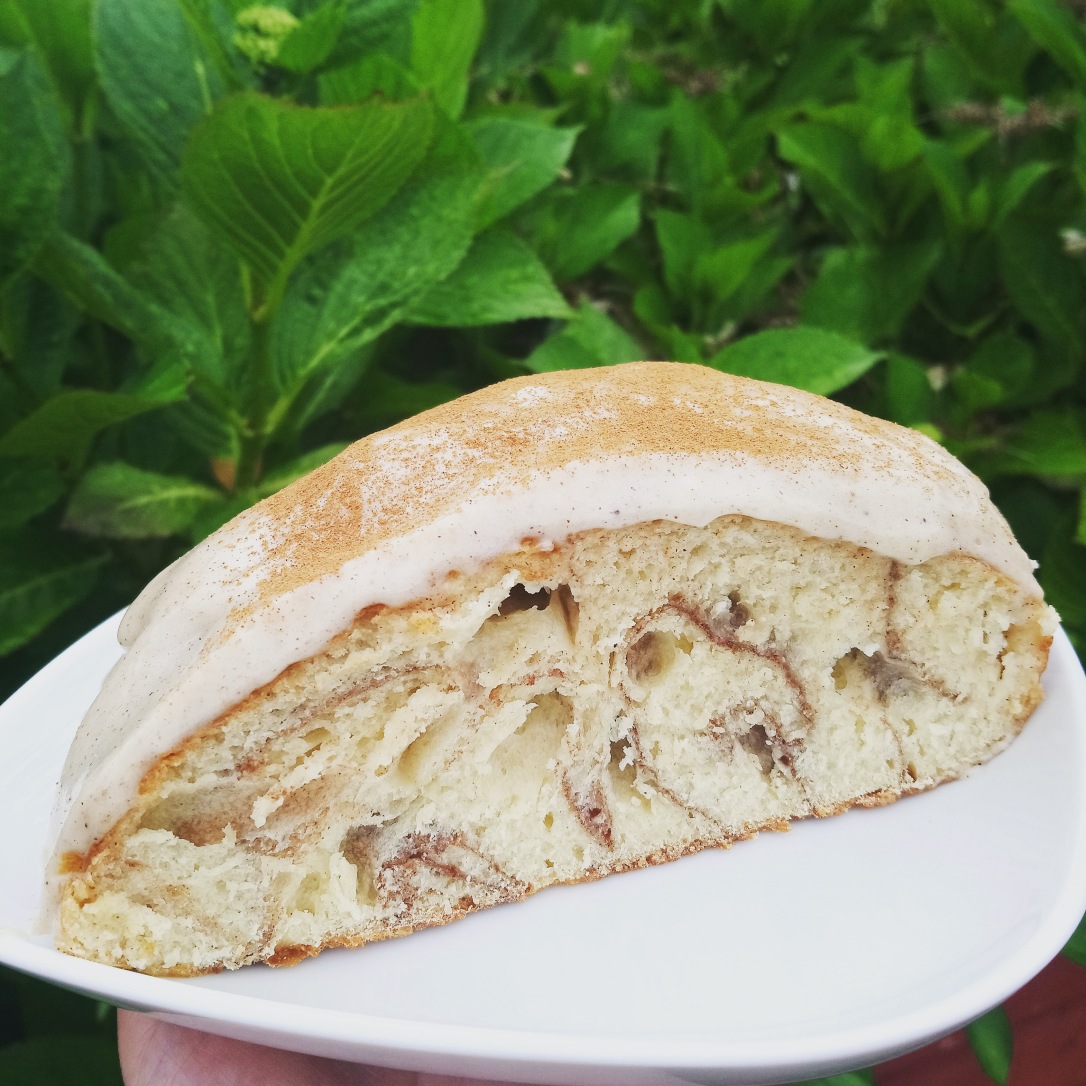
Well, to be honest they expanded much more than I thought they would so instead of eating them as an individual roll, you cut a slice as they formed a nice loaf.

I kneaded these by hand, which was a really bad idea as I don’t seem to have enough energy to do that and the cramp wasn’t fun. Next time I’ll just get out the Kenwood mixer with the dough hook. They did get about 15 minutes kneading but I don’t know if this was enough so I’ll have to let you know when I’ve eaten all of it some.

I only made a small batch as everyone is on their post Christmas diets so this recipe just made 6 roles instead of 12.


Yummy squidgy cinnamon rolls (loaf)

IMG_20180530_184606_045.jpg

Makes 6 rolls or one loaf

  • 7g dried active baking yeast
  • 7 tablespoon light brown sugar
  • 1 teaspoon salt
  • 220ml warm water (should just feel warm on your skin)
  • 400g strong plain white flour
  • 1 egg
  • 2 1/2 tablespoons vegetable oil
  • 4 tablespoons caster sugar mixed with ground cinnamon (or use sweet cinnamon, like I did which is already combined with sugar)

Method

Mix up the water, sugar and yeast in a bowl and leave it for a few minutes till it starts to look frothy.

In another bowl add the salt, flour, egg and oil. You can make a little well in the middle but if you’re doing the initial mixing in a bowl you don’t need to worry about it running off the kitchen counter.

Mix the water and yeast mix into the other bowl with the flour. You’ll need to stir till you have no lumps left and it’s starting to look like dough.

Now comes the hard work. On a floured surface knead your dough. It will be sticky and hard to work with but keep going (till your arms hurt and then some more) and it will start to stick to itself and not everything around it.

When it’s been kneaded for at least 10-15 minutes then put it in a bowl that’s been lightly oiled and cover with clingfilm or a tea towel.

Now you can rest and have a cuppa tea as you’ll need to just wait about an hour for it to rise.

After its risen and looks much bigger then take it out, give it a quick knead and divide into 6 pieces.

Roll each piece into a rectangle and spread over the cinnamon sugar mix to each bit then roll it from one end to the other.

Put all 6 little rolls into a non stick or oiled tray, close together but not touching and cover them again to let them rise. This will be 40 mins – hour depending on how warm your kitchen is.

For me I put them too close and they merged and made a very interesting swirl bread.

Pre heat the oven to 180c and bake for approx. 30 mins.

Cool on a rack

You can add whatever topping you like but I went with the classic cream cheese

Cream cheese mixed with icing sugar and a splash of milk. Otherwise you could have this with custard or just icing sugar and water.

I gave it a dusting of cinnamon, as you can never have too much and ta-dah all done.

It won’t last too long as it’s home made bread and also rediculously tasty but keep it in a sealed container.

Bread, Savoury

Baking rosemary bread rolls in Italy

I love Italy, I love the food, people and atmosphere, I feel very at home there which is good as this year will probably be my 28th time I’ve been there to the same place in Italy for holiday. A few years ago my dad inherited a family house, a very old house which is stuck in the 1950s with no boiler or hot water. We cook on a gas stove but I think it’s great.

This year I decided that I wanted to make the bread for our lunch times (as the crusty dry loaves we eat every day hurt my teeth). I bought the yeast with me from the UK but everything else I got when I was there.

I made 3 different types of bread with varying degrees of success, though I was pleased with any success since I had no scales to measure my ingredients with!*

The recipe and pictures today are from my bread rolls. They are so very simple but I managed to get them to work and we ate them all up very fast.

*How I measured the flour without scales was to buy 1kg bags of flour and guess that it’s half of it. Simples.


Rosemary bread rolls

  • 500g bread flour
  • 2 tsp dry fast acting yeast
  • 2 tsp sugar
  • 1 tbsp salt
  • 300ml water
  • 1 tbsp olive oil
  • Chopped up rosemary (or you could substitute for any dry herb, I used fresh rosemary)

In a bowl add all of your dry ingredients, except the rosemary,making sure that the salt is on the otherside to your yeast.

Make a well in the middle and pour most of the water and the oil into the centre.

Using a wooden spoon, stir the mixture till it starts to come together then add in the last bit of water and mix.

Tip onto a clean work surface and start to knead the bread. At first it will be very sticky and you’ll want to add extra flour…don’t! Trust me, it will start to come together into a dough.

Keep kneading till it looks like dough and doesn’t stick to everything like glue. This will take at least 10 mins by hand.

Put the dough into a lightly oiled bowl and cover with a tea towel. Leave till the dough has risen well (in Italy this was about an hour as it was so hot, in UK temperatures it’s probably closer to 2 hours)

Once risen put back onto the work surface and ‘knock back’ which is to knead the dough a bit more. Now add your herbs at this point.

Cut the dough into 8 pieces and roll into ball shapes. Put them close but not touching on your baking tray. I’d line a baking tray with non-stick paper and flour generously. Cover very loosely.

Heat the oven to 220c and let the dough rise for another hour.

Bake for 15 minutes until lovely, golden and happy to see you.

Quiche/Flan, Sweet

Home made Anise (aniseed) extract

A few months ago I was reading through my Italian cookie cookbook and found there were quite a few recipes which use aniseed extract.

Great, my husband loves aniseed and liquorice flavoured things so I thought it would be a lovely treat for him to make him something with these flavours and I began to look about in shops for aniseed or anise extract to use.  Unfortunately, it seemed to be a very elusive product to buy in a store, so much so that the only way I was going to get it was to buy online or make my own.  Usually I’m a big fan of online shopping as you can always get what you need at a cheap price, but this time I found I was having difficulty. There were two problems: there weren’t many shops selling and the shops that did sell it only sold in bulk orders.  I was left with only one viable option and that was to make it myself.  Luckily I had bought some star anise a while ago from Stratford upon Avon which I always thought would come in handy (but I wasn’t entirely sure what to do with it).  Making it was very simple just add star anise and vodka and ta-dah, you’re own extract after waiting just 3 months.  What?! 3 MONTHS! I’m not exactly the most patient person but I had no choice so in July I bottled it up and waited…until October.  If you’ve been following my life you’ll realise that October was a pretty eventful month as my baby decided it was time to make her appearance into the world.  Unsurprisingly, I never got round to using my extract until now, 6 months after I started it.

I decided to make some Italian anise cookies with it for my husband and I’m really pleased with it. I’m glad after all that time it was worth the wait.


Anise/Aniseed extract Half fill a small air tight jar with Star Anise then pour enough good quality vodka to cover them completely.  Put the lid on and leave for at least 3 months.  Every week (ish) give the jar a gentle shake but do not open till its ready. Its useful to write the date on you started it so you don’t forget.


Anise and Almond CookiesItalian Anise and Almond cookies I used this fab recipe to make the cookies –   Anise and Almond Cookies  They are very authentic Italian in their taste and look very home made when finished, but I think that’s what gives them charm.  I made the cookies without the flavour, then split the batch into two and added the aniseed extract to half and flavoured the other half with Almond. The pink ones are Anise and the purple ones with glitter are Almond.

Bread, Savoury

Hobbs House Sourdough Family

Last week me and my family went to see the Fabulour Baker Brothers at Stratford Food Festival and they were as good as I hoped they would be!

Tom and Henry did a brilliant talk and kept everyone entertained despite the horrible weather outside, the hard chairs and the rain leaking through the roof. I would love to see them do a talk again and it hopefully shouldnt be too long till their new series starts.

The other thing we managed to get was a small jar of 57 year old Hobbs Bakery Sourdough starter. It was a bit of a squash to get one but both me and my dad are now proud owners of our own little jars and last night we started our own one.

We received these instructions to feed and grow it:
Find a suitable container to house your sourdough. A Kilner jar is good. Clean it well and weigh it while it’s empty, noting the weight on an address tag or label.
(This saves you having to empty it out to know how much you have left –
it’ll be worth it later.)

Weigh 75g organic wholemeal or dark rye or wholemeal spelt flour into the jar
(any of these will work well), then weigh in 75g/ml warm water. Using a spoon, add your Hobbs House 57 year old sourdough to your flour and water and stir. Leave your jar in a prominent and warm place (its second home) in your kitchen, with the lid sealed.

Each day for up to a week (though a couple of day should do it), repeat the feeding process (75g flour and 75g water, as before), stirring vigorously with a clean finger or a fork to remove all floury lumps until you notice bubbles in the dough. Like the first windy smile of a baby, you know that soon enough it’ll be laughing and telling jokes, and you’re on your way to the most rewarding kind of baking.

Once you can see bubbles in the jar you can start to keep the sourdough culture in the fridge (its first home), only removing it on the morning of baking day, to feed it back into full bubbly liveliness (75g flour and 75g water, as before).

It’s quite laughable just how simple it can be to keep your sourdough in peak condition for really tasty loaves, if you feed it occasionally and mostly keep it
in the fridge.

If the sourdough is not performing well enough, try taking it out of the fridge a day before you want to use it, and giving it an extra feed. Remember that, as
a living culture, it needs to be fed if it’s not hibernating in the fridge (where it can survive for several months). It likes to be warm and aerated
(stirred/whisked) occasionally.

If it dies (“de-natures” – you’ll know because it will smell disgusting), bin it and start again. With a bit of good husbandry and some forward planning, your sourdough could live forever.


I have made mine with wholemeal flour and all going well, I will be able to have my first sourdough loaf on Saturday. Fingers crossed it will work, wish me luck.

Bread, Savoury

Foccacia – a bread anyone can make, even me!

I admit that I am not the best at making bread.

My first foray into bread making came when the new issue of Good Food magazine arrived before Christmas 2010. Inside was the recipe to make Panettone – the Christmas sweet cake/bread which is supposed to be light and fluffy like air. Unfortunately I didn’t understand the importance of kneading bread so I think I skipped a kneading and rising time and just hoped for the best.

The good thing about it was the taste, it was lovely and tasted just like a Panettone should do, however, the bad thing was that it weighed about as much as I do! It was so dense and heavy that my family still remember my failed attempt and laugh when we get one at Christmas.

For a while I was a bit scared to even touch a dough or try making bread of any sort, but this changed when I watched the last series of the Great British Bake off.
After getting the cookbook as a present I have made iced fingers, white loaves, bread rolls and bread plaits.
Still, every time I still feel completely amazed that it worked.

I have never tried to make speciality bread but this time I felt brave, I was going to make a foccacia!

Luckily I used a very easy and simple recipe from Lorraine Pascal and it came out perfect. I am sure that it is not a traditional Italian recipe but the end results are so close that you needn’t worry. It is definitely worth having a go, especially since it only needs one set of kneading and looks and tastes very good.  I also use my very best olive oil in this recipe, imported from Italy – the taste is just non-comparable.

All you need is a bit of Italian sunshine, some salami, bread and a glass of wine.  Buon appetito.

Lorraine Pascal’s Foccacia