Bread, Sweet

Accidental cinnamon roll loaf

My daughter always asks me why I don’t make pizza on Friday like her grandad does and unfortunately my answer is because I don’t have time when I’m back from work.

I love making bread and bread based things, there’s something so satisfying about doing it all by hand and the smell when they’re baking is just wonderful.

But with a full time job and 2 children I don’t get much chance to do it, so I decided – let’s make bread!

I was initially going to make bagles but I’ve decided to leave these till a weekend or Friday morning so we can have fresh ones when my daughter is home… Now we have cinnamon rolls instead.

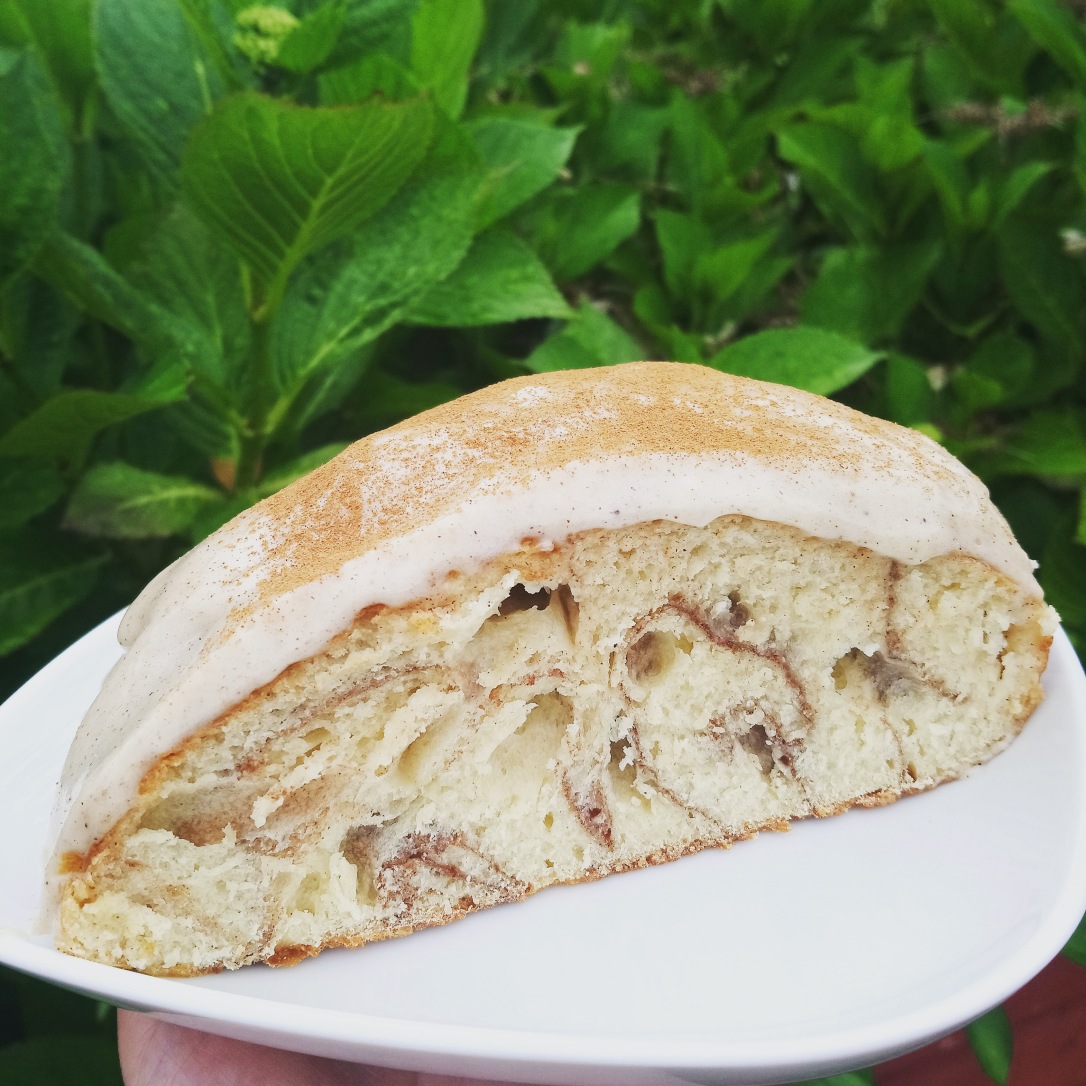
Well, to be honest they expanded much more than I thought they would so instead of eating them as an individual roll, you cut a slice as they formed a nice loaf.

I kneaded these by hand, which was a really bad idea as I don’t seem to have enough energy to do that and the cramp wasn’t fun. Next time I’ll just get out the Kenwood mixer with the dough hook. They did get about 15 minutes kneading but I don’t know if this was enough so I’ll have to let you know when I’ve eaten all of it some.

I only made a small batch as everyone is on their post Christmas diets so this recipe just made 6 roles instead of 12.


Yummy squidgy cinnamon rolls (loaf)
IMG_20180530_184606_045.jpg

Makes 6 rolls or one loaf

  • 7g dried active baking yeast
  • 7 tablespoon light brown sugar
  • 1 teaspoon salt
  • 220ml warm water (should just feel warm on your skin)
  • 400g strong plain white flour
  • 1 egg
  • 2 1/2 tablespoons vegetable oil
  • 4 tablespoons caster sugar mixed with ground cinnamon (or use sweet cinnamon, like I did which is already combined with sugar)

Method

Mix up the water, sugar and yeast in a bowl and leave it for a few minutes till it starts to look frothy.

In another bowl add the salt, flour, egg and oil. You can make a little well in the middle but if you’re doing the initial mixing in a bowl you don’t need to worry about it running off the kitchen counter.

Mix the water and yeast mix into the other bowl with the flour. You’ll need to stir till you have no lumps left and it’s starting to look like dough.

Now comes the hard work. On a floured surface knead your dough. It will be sticky and hard to work with but keep going (till your arms hurt and then some more) and it will start to stick to itself and not everything around it.

When it’s been kneaded for at least 10-15 minutes then put it in a bowl that’s been lightly oiled and cover with clingfilm or a tea towel.

Now you can rest and have a cuppa tea as you’ll need to just wait about an hour for it to rise.

After its risen and looks much bigger then take it out, give it a quick knead and divide into 6 pieces.

Roll each piece into a rectangle and spread over the cinnamon sugar mix to each bit then roll it from one end to the other.

Put all 6 little rolls into a non stick or oiled tray, close together but not touching and cover them again to let them rise. This will be 40 mins – hour depending on how warm your kitchen is.

For me I put them too close and they merged and made a very interesting swirl bread.

Pre heat the oven to 180c and bake for approx. 30 mins.

Cool on a rack

You can add whatever topping you like but I went with the classic cream cheese

Cream cheese mixed with icing sugar and a splash of milk. Otherwise you could have this with custard or just icing sugar and water.

I gave it a dusting of cinnamon, as you can never have too much and ta-dah all done.

It won’t last too long as it’s home made bread and also rediculously tasty but keep it in a sealed container.

Chocolates/Truffles, Sweet

White chocolate Rocky Road recipe – an easy children’s bake

My daughter now has a little brother but until 6 months ago she was an only child; luckily we do have a street full of other children to play with.

The problem is me, I’m starting on the new adventure of parenting called ‘Entertaining other people’s children’! So on a Saturday morning in the summer I ended up with 6 girls playing in my garden (sometimes happily, sometimes bickering) but only one was mine.

I thought it would be a good idea to invite them in to come and make cakes which they were very excited to do.

I told them all to ask their parents whilst I set up my kitchen for something I was hoping would be a fun task for them all… And it was!

After diligently washing their hands each girl had their own little bowl and a teaspoon, and in the middle of the table I set up an array of things. There were lots of cupcake cases, rice crispies, glace cherries, marshmallows, raisins and my special case of cake decorations. I did the job of melting white chocolate over a bain marie then gave each girl two tablespoons of white chocolate. I instructed them to add their own treats and stir all together. Once complete they each put them into two cupcake cases, decorated with random decorations like silver balls and voila! 6 happy girls and 12 awful looking (but lovingly crafted) rocky roads.

It was a lot of fun and surprisingly easy to clean up. Bowls in the dishwasher, left over marshmallows in the bin and a quick hoover.

If you ever need ideas for a baking party then this is definitely it. They were proud of their cakes and so were the parents. Next time it’s decorating cupcakes…


White chocolate rocky road cakes

  • Large bar of white chocolate
  • Little marshmallows
  • Dried fruit (glace cherries, raisins)
  • Anything for optional crunch (rice crispies, nuts)

In a bain marie melt the chocolate slowly whilst stiring. A bain marie is a pot over hot water without the bottom of the pot touching the water. You can do it in a microwave as well but be careful to melt in short bursts and keep stirring.

Take the bowl off the heat (or out of the microwave) and stir in handfuls of the other ingredients till they stick together nicely without too much extra chocolate about but also not too dry they won’t hold their shape.

Then either pat down gently into a tray or spoon into individual cupcake cases. Whilst the chocolate is still warm sprinkle any decorations you like.

Chill in fridge for half hour till set.

Don’t worry, they are never going to be the cutest of cakes but kids and adults will love them! And they’re great for no baked cake emergency.

Bread, Savoury

Baking rosemary bread rolls in Italy

I love Italy, I love the food, people and atmosphere, I feel very at home there which is good as this year will probably be my 28th time I’ve been there to the same place in Italy for holiday. A few years ago my dad inherited a family house, a very old house which is stuck in the 1950s with no boiler or hot water. We cook on a gas stove but I think it’s great.

This year I decided that I wanted to make the bread for our lunch times (as the crusty dry loaves we eat every day hurt my teeth). I bought the yeast with me from the UK but everything else I got when I was there.

I made 3 different types of bread with varying degrees of success, though I was pleased with any success since I had no scales to measure my ingredients with!*

The recipe and pictures today are from my bread rolls. They are so very simple but I managed to get them to work and we ate them all up very fast.

*How I measured the flour without scales was to buy 1kg bags of flour and guess that it’s half of it. Simples.


Rosemary bread rolls

  • 500g bread flour
  • 2 tsp dry fast acting yeast
  • 2 tsp sugar
  • 1 tbsp salt
  • 300ml water
  • 1 tbsp olive oil
  • Chopped up rosemary (or you could substitute for any dry herb, I used fresh rosemary)

In a bowl add all of your dry ingredients, except the rosemary,making sure that the salt is on the otherside to your yeast.

Make a well in the middle and pour most of the water and the oil into the centre.

Using a wooden spoon, stir the mixture till it starts to come together then add in the last bit of water and mix.

Tip onto a clean work surface and start to knead the bread. At first it will be very sticky and you’ll want to add extra flour…don’t! Trust me, it will start to come together into a dough.

Keep kneading till it looks like dough and doesn’t stick to everything like glue. This will take at least 10 mins by hand.

Put the dough into a lightly oiled bowl and cover with a tea towel. Leave till the dough has risen well (in Italy this was about an hour as it was so hot, in UK temperatures it’s probably closer to 2 hours)

Once risen put back onto the work surface and ‘knock back’ which is to knead the dough a bit more. Now add your herbs at this point.

Cut the dough into 8 pieces and roll into ball shapes. Put them close but not touching on your baking tray. I’d line a baking tray with non-stick paper and flour generously. Cover very loosely.

Heat the oven to 220c and let the dough rise for another hour.

Bake for 15 minutes until lovely, golden and happy to see you.

Cake, Sweet

Earl Grey Tea Bread

Surprisingly for someone who loves tea as much as I do, it took me until my 32nd birthday to try tea bread.
I don’t know why I never had this before its lovely! And as you’d expect from the name it goes perfect with my copious amounts of tea.

My boyfriend bought me my first ever one as a birthday present and it came from an expensive artisan shop so when I tried it it was beautiful. The next one I tried was from Aldi – I never noticed it in there before but now I suddenly saw it.

Now, had I tried the Aldi one first I’d have loved it but as I had the Buxton tea bread it just didn’t taste anywhere near as good.

As usual this prompted me to try and make my own version. I used this recipe but changed the tea.

Good to know – Tea Loaf

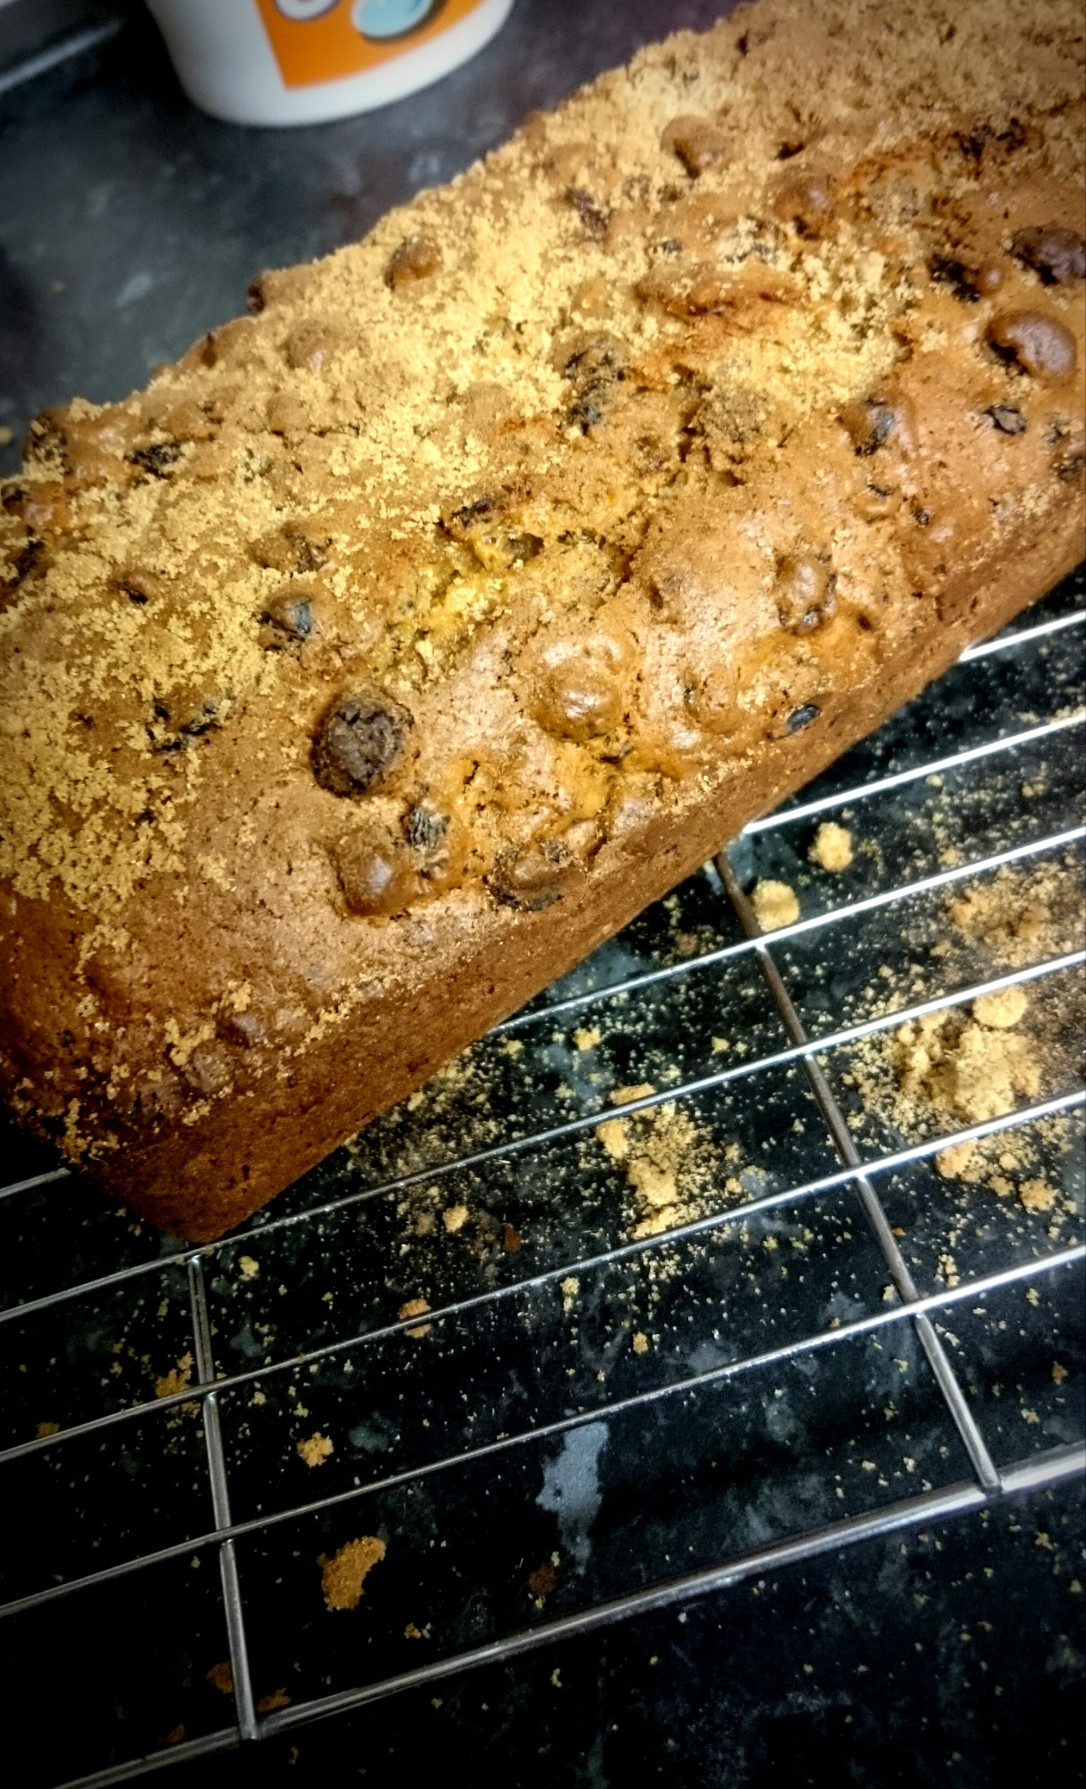
This is the recipe I have used for my base but instead of Roobios I have used a lovely loose Earl Grey tea to infuse my fruit. I left it for about 5 hours to soak and I also added some extra mixed spice and some cinnamon. To top the cake off, for the last 20 minutes I have sprinkled the cake with a mix of brown sugar and cinnamon.
Unfortunately I can’t tell you how this has come out yet because although the cake looks and smells amazing, it says to wait at least two days!

I’m stuck looking at a lovely hot cake which I can’t eat. I really hope it’s worth it because I don’t have much restraint for resisting cake but if it makes it special then it’ll be worth it.

Chocolates/Truffles, Sweet

Dusted Cherry Truffles

Cherry Truffles

Due to the usual Christmas lull I’ve reduced the amount of sweet making and baking down to a minimum but after I made a Black Forest Gateaux inspired cake I was left with 300ml of double cream.

I decided that it was a sign, a sign to make chocolate truffles! Not that I really needed a sign but you know, inspiration comes in many forms and this time it came in exactly 300ml of cream.

I love to make truffles but the part I don’t like is the rolling and shaping, it is messy and I never seem to do a really good job of it. This time I am going to try different methods one day – rolling in cocoa, coating in chocolate and piping into chocolate moulds.

I have found the ones coated in a dusting of cocoa powder to be the most successful ones to eat so far but they are not the prettiest. I think this is because the truffle mix was a little too soft when I tried to shape and because I am not very good yet at tempering chocolate.

Rolling them in cocoa powder is the easiest to do.

I flavoured the inside of the truffle mix with cherry and rolled in cherry cocoa powder, from the company Sugar and Crumbs. Although these are a little bitter (maybe some icing sugar added next time) they look more like truffles and are easier to shape.

I might be a long, long way from master chocolatier but these look a lot more impressive than the skills required to make them.


Dusted Cherry Truffles

Ingredients

  • 300g Dark Chocolate
  • 300ml Double Cream
  • 50g Butter
  • 1 tablespoon cherry liquor
  • Cocoa Powder (ideally cherry flavoured)

Method

Chop up your chocolate and put into a large bowl and set aside

In a pan heat up the cream and butter slowly till the butter melts and the cream begins to simmer. This is where you start to get a few gentle bubbles on the top, try not to boil it!

Immediately pour over the chocolate and stir until it the chocolate has melted

Add in your cherry liquor, or any other flavour you fancy. Add it a little at a time and taste as you don’t want to add too much and make it too strong.

When the mix has cooled a little, refrigerate for at least 4 hours

Take the mix out of the fridge and either using a teaspoon or a melon baller, spoon out truffle sized pieces and working very quickly roll them in your hands till they are ball shaped

Once you have the shape roll them into the cocoa powder and set aside

After all of them are finished, keep them in the fridge in an airtight container and they should last a couple of days (if you don’t eat them all in one night and feel completely sick)